Configure Voicemail Endpoint
In this guide, you will learn how to create and configure a Voicemail endpoint. A Voicemail endpoint can be used together with an application to record and playback voicemail messages.
Currently, you cannot create a Voicemail endpoint using the CarrierX portal, that is why you will need to use the API to do that.
Refer to our How It Works: Endpoints section to learn more about what endpoints are, what endpoints are available in CarrierX API, what they are used for, and how you can work with them.
I. Create Voicemail Endpoint Using REST API
- Register with CarrierX to access the API and CarrierX portal.
- Rent a phone number from CarrierX to associate it with the created Voicemail endpoint later.
In this section, we will go over creating a Voicemail endpoint using the REST API.
Form a POST request and include at least the voicemail endpoint type in the request body. Refer to the Create Endpoint section of the Core API Reference for a list of the other fields that can be added at the time of creation.
curl -X POST \
'https://api.carrierx.com/core/v2/endpoints' \
-H 'Content-Type: application/json' \
--data-binary '{"type": "voicemail", "name": "voicemail"}' \
-H 'Authorization: Bearer 5ebc03d6-8b2b-44ad-bf65-72d4f1491dda'
A successful request will return a 200 status code and the created endpoint body data in the JSON format:
{
    "addresses": [],
    "attributes": {},
    "capacity": 0,
    "endpoint_sid": "7bbb5255-234f-4288-a80d-c8b99eecad0d",
    "name": "voicemail",
    "out_sip_password": null,
    "out_sip_username": null,
    "partner_sid": "ed437757-002d-4ecc-aa5a-efdf5e50dba0",
    "properties": {},
    "transformations": [],
    "type": "voicemail",
    "voip_token": null
}
As you can see, the endpoint properties are not set by default and must be set manually. Refer to the next steps for more information about this.
II. Create Container
In this section, we will create a container. This container will store your greeting file and future voicemail messages.
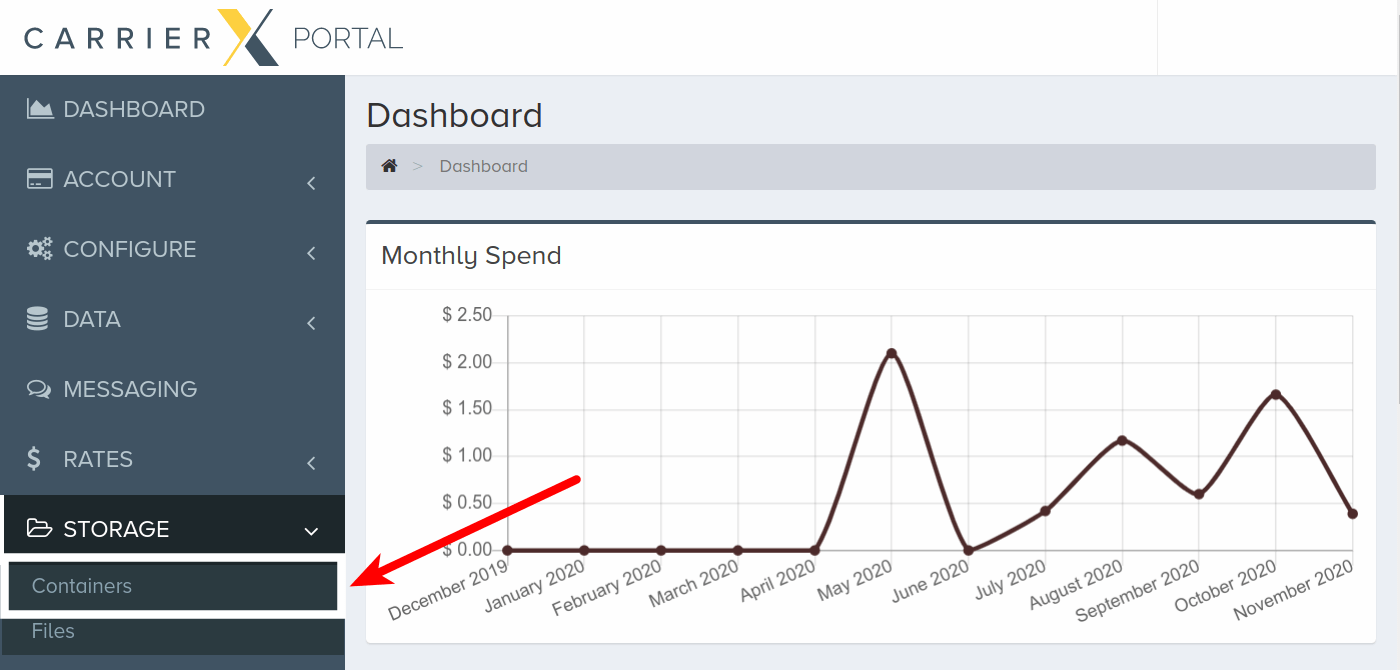
In the left-side menu click Storage and then Containers:
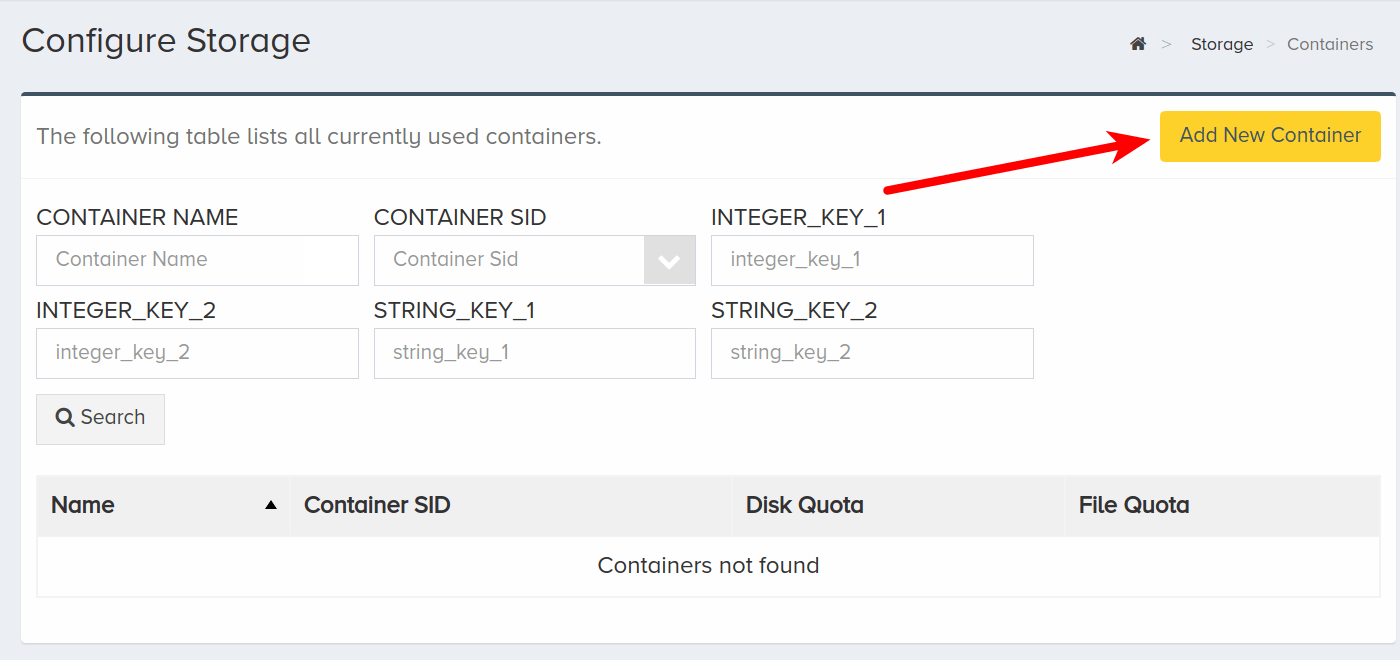
Click Add New Container:
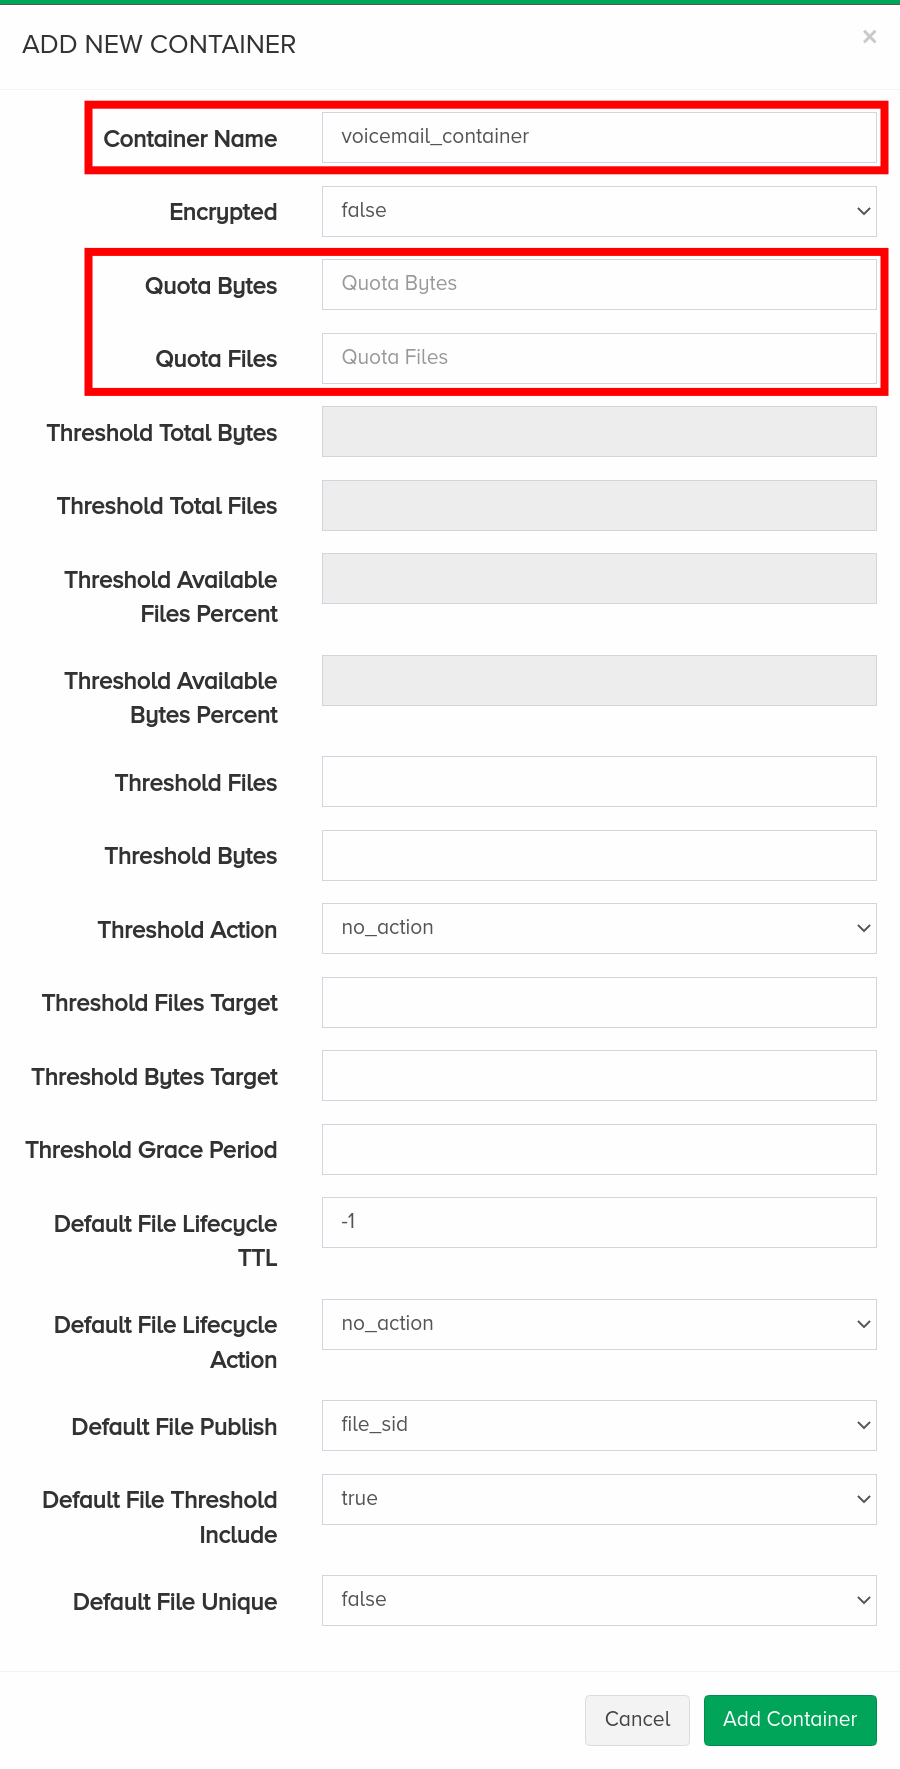
Enter a friendly name for the new container that is used for internal reference. Enter integer values for Quota Bytes and Quota Files.
The quota sizes should be large enough to accommodate the size and amount of files that you require.
If you leave the quota fields blank, the container size and file number will not be limited and can expand to take the entire storage available to you.
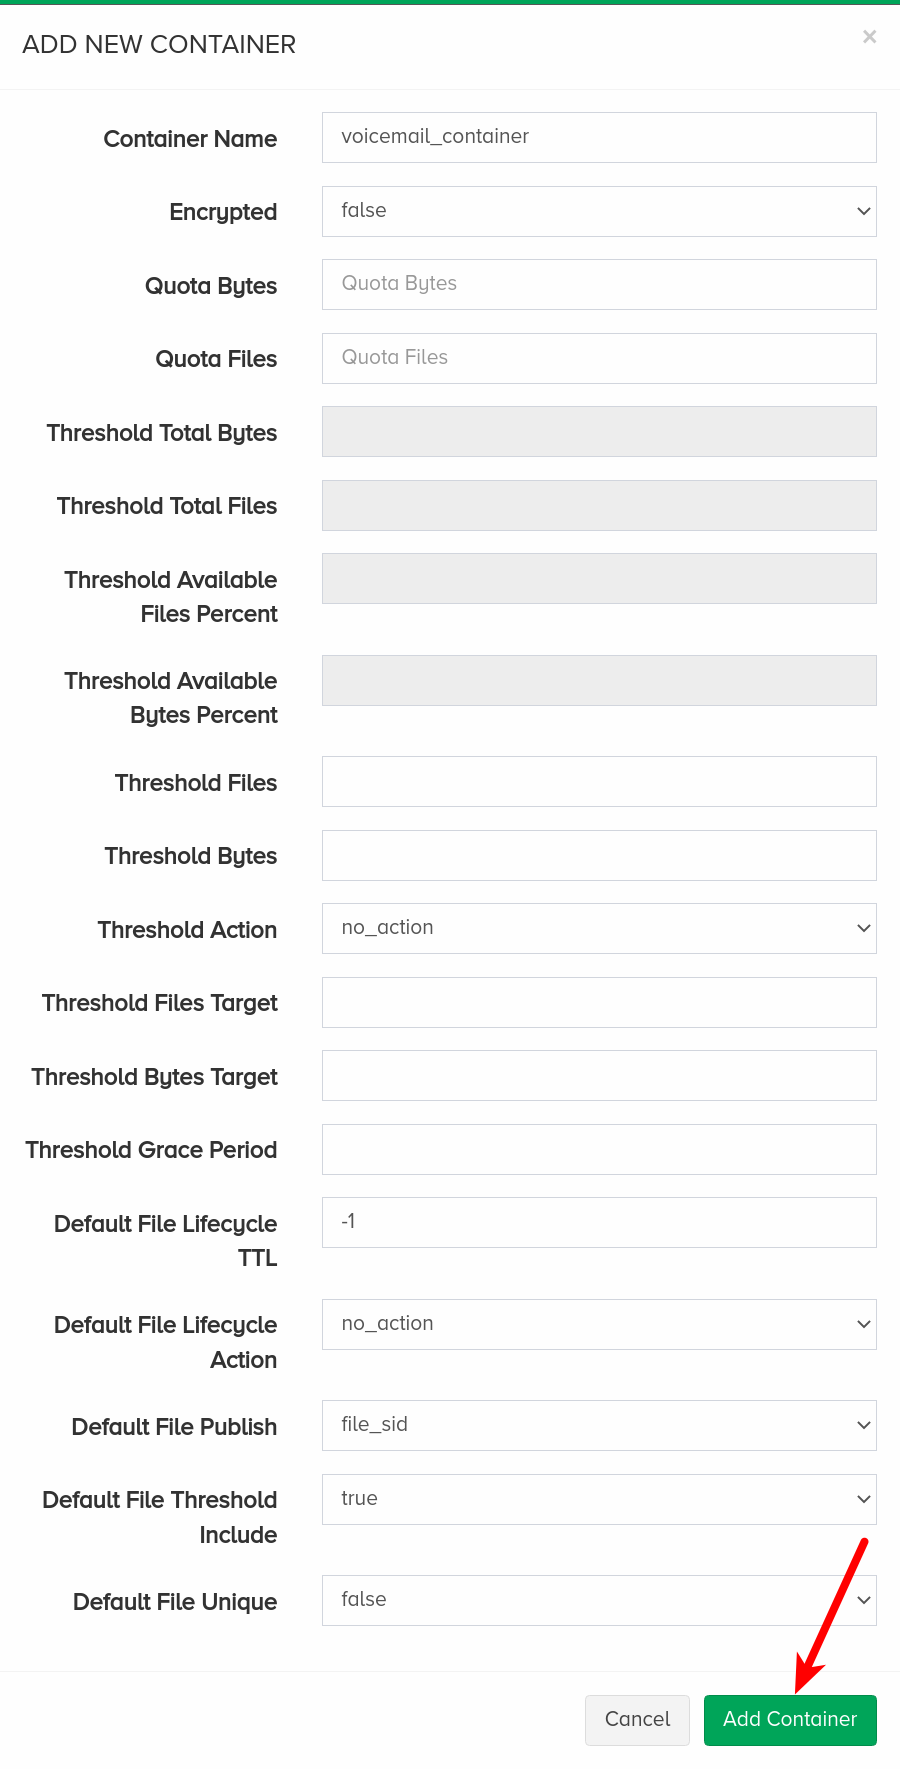
Click Add Container when finished:
III. Upload Greeting File
- Record a greeting file and save it into one of the supported audio formats.
In this section, we will upload a greeting file. This audio file will be used as a greeting for all voicemail messages.
This is an optional step. You might choose to store the greeting file with some other service or host it on your own server.
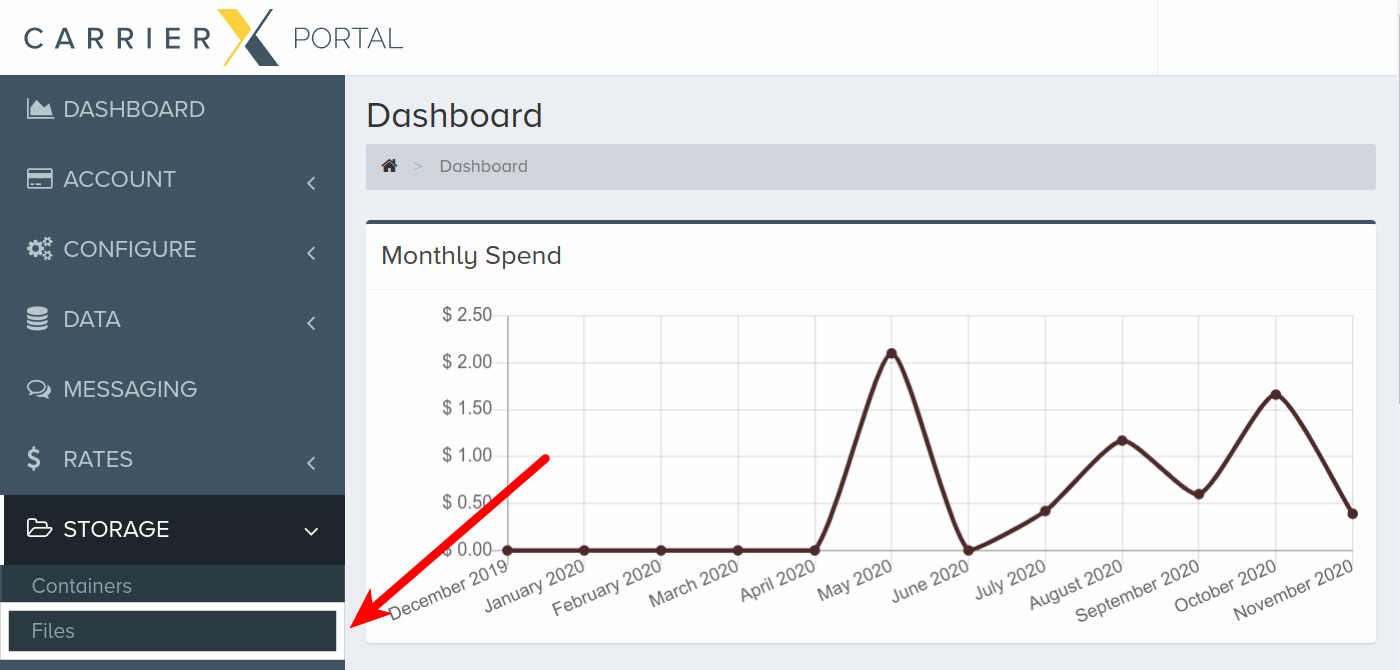
In the left-side menu click Storage and then Files:
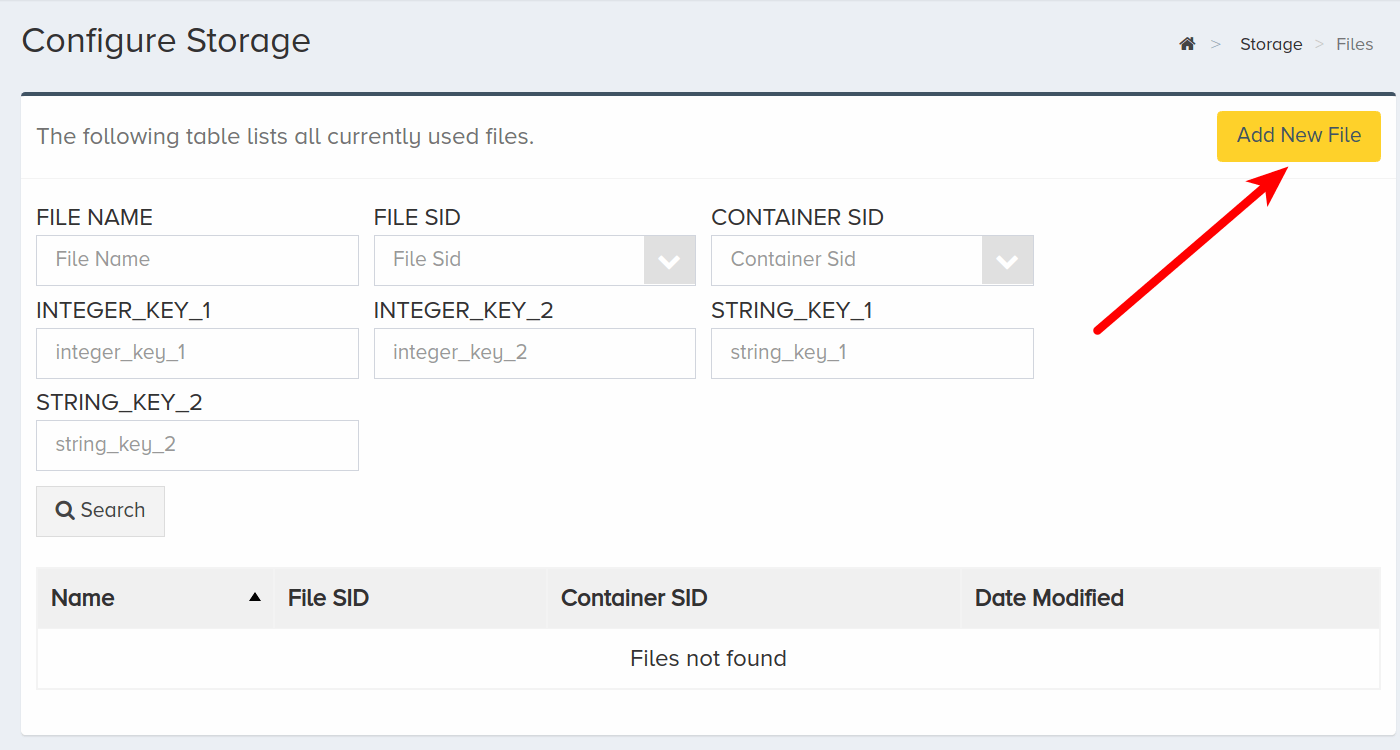
Click Add New File:
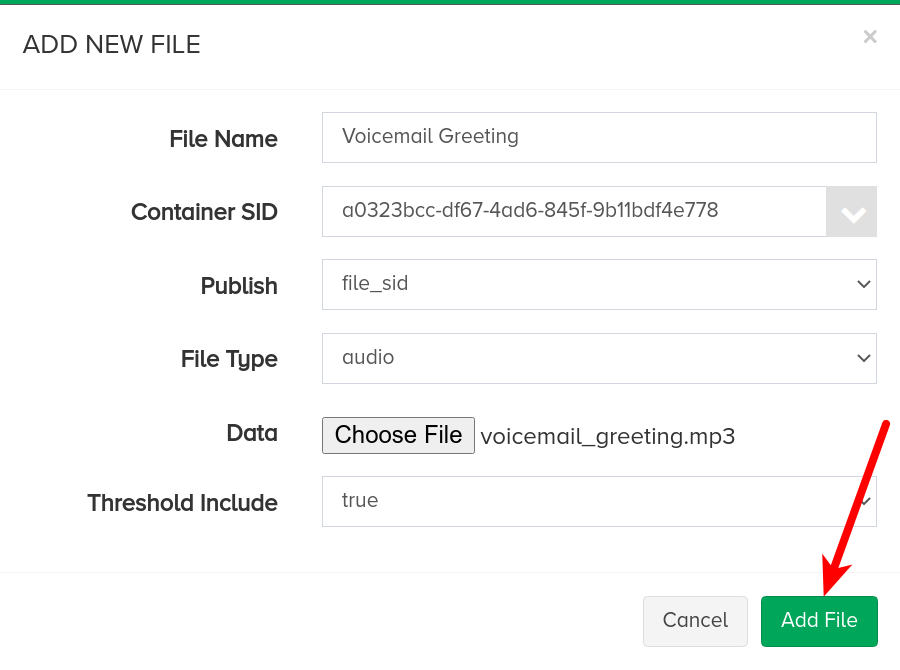
Enter the File Name (you will use it to distinguish this file from the other ones), select the previously created container, choose to publish file as file_sid, and set the File Type to audio. Browse for the audio file on your computer.
Click Add File when ready:
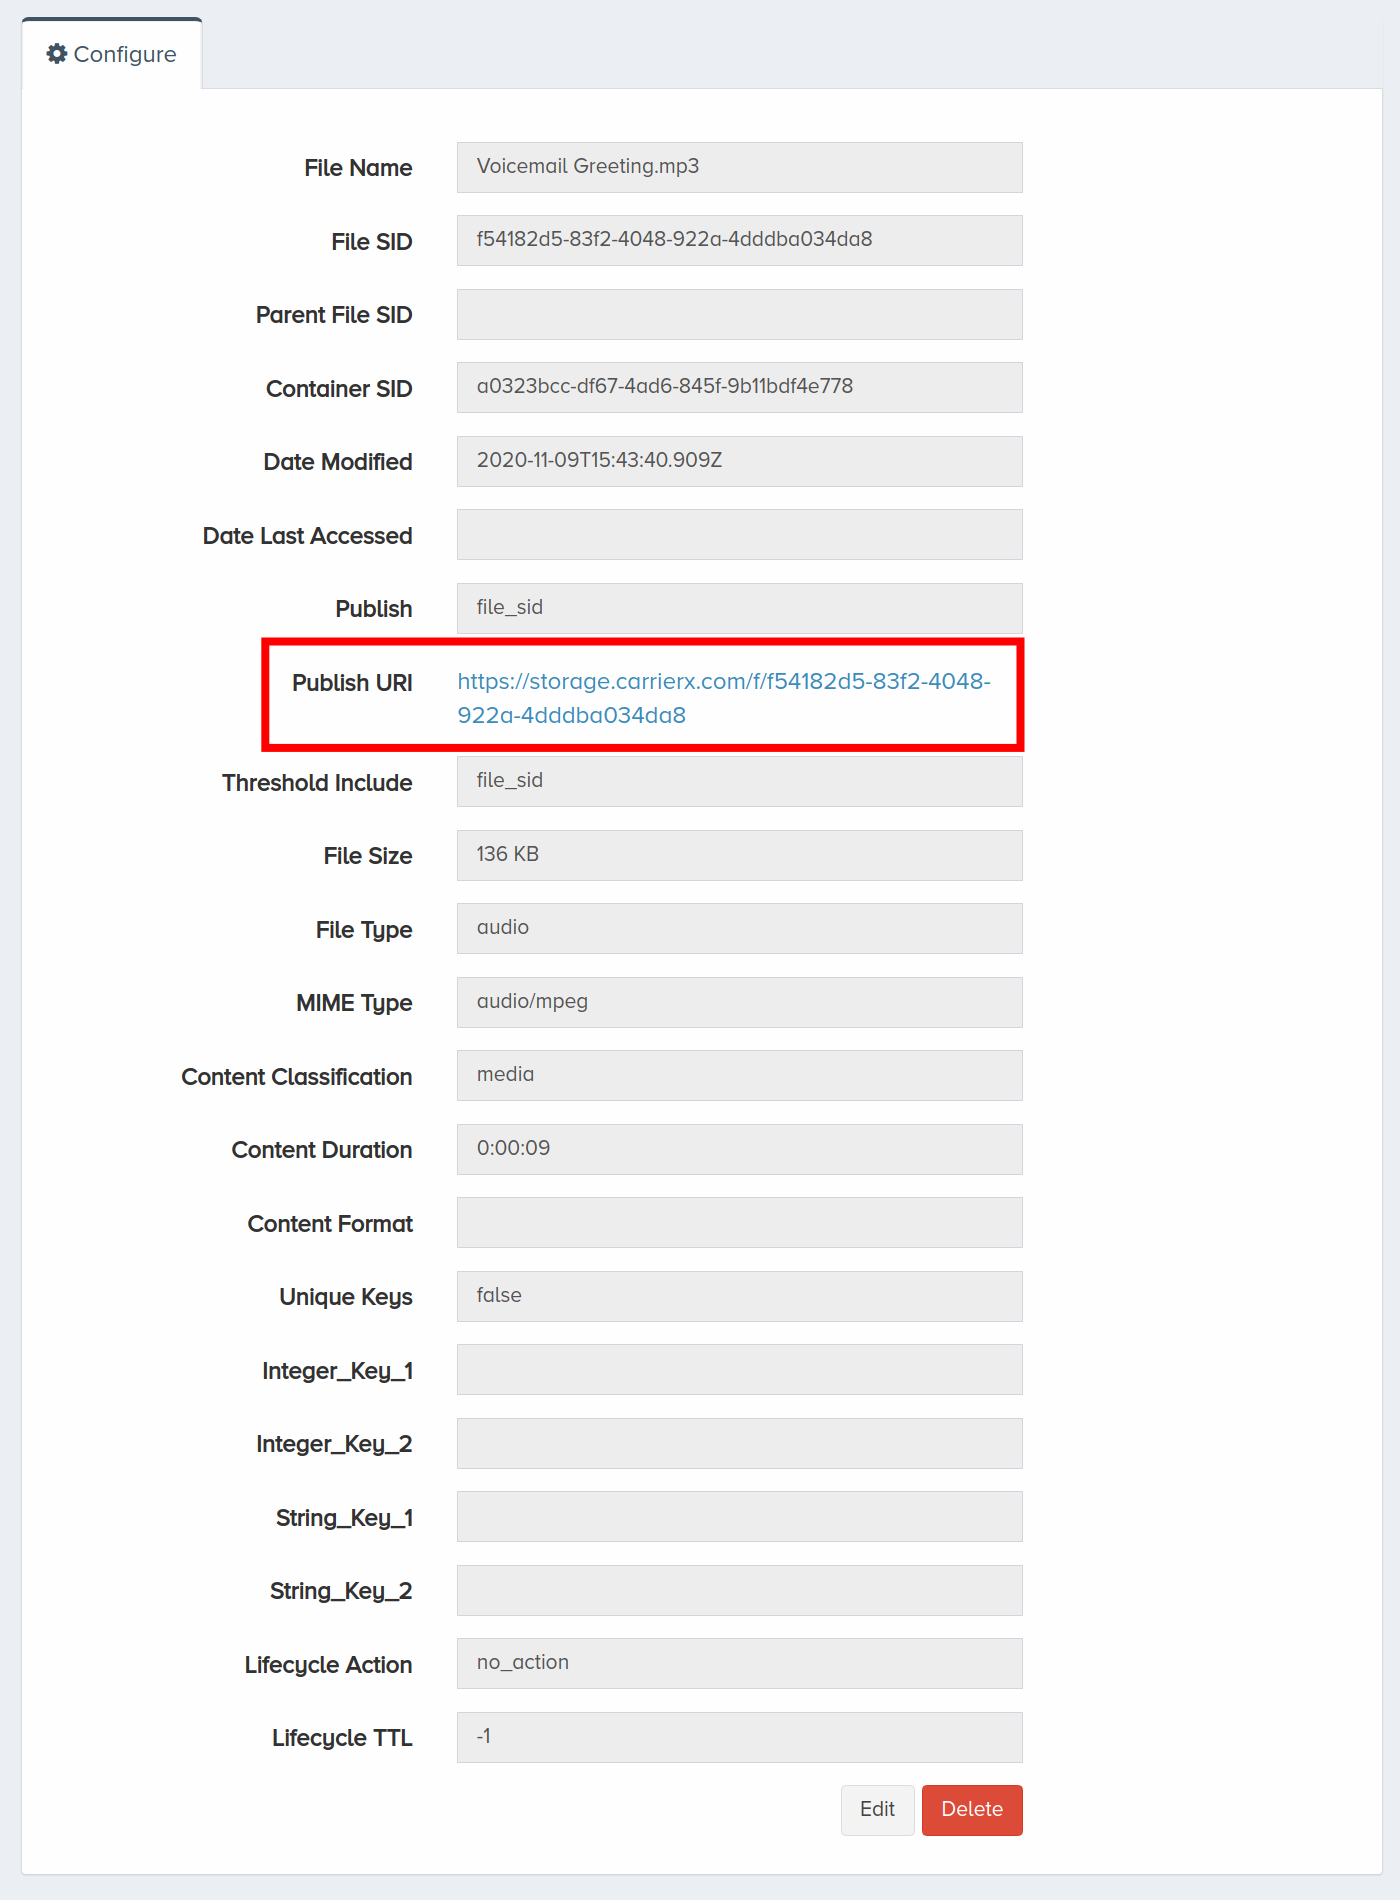
The file will be uploaded and associated with the container. When you click the file in the list, you will see its properties. Note the Publish URI value, which is publicly accessible link to the file. You will need it at the next step.
IV. Change Voicemail Endpoint Properties
- Create and deploy a web application that will be able to store and manage your recordings after they are exported there (this is optional, as you can store and manage your recordings with the CarrierX storage).
After the endpoint is created, you must set some of the properties, specific to voicemail endpoint object. These properties include:
callback_method: the method that Voicemail endpoint uses to report to the callback URL when the recording is finished, can be eitherPOSTorGET.callback_url: a URL to which an HTTP request is sent after the recording is finished.container_sid: the identifier of a CarrierX storage container, which we created at Step II. The Voicemail endpoint uses this container to store voicemail recordings or as a temporary storage before exporting them to an external storage.greeting: a URL of an audio file that will be used as a greeting (for example, the greeting file from Step III). The file will not interfere with voice recording files in the same container.
Please note that callback_url is not necessarily just a domain name (e.g., http://your-website.com). It can be the complete path to the web application hosted in the web (e.g., http://your-website.com/your-app). The main thing is that it must be reachable by the CarrierX Voicemail endpoint.
Send the following PATCH request to set the properties:
curl -X PATCH \
'https://api.carrierx.com/core/v2/endpoints/7bbb5255-234f-4288-a80d-c8b99eecad0d' \
-H 'Content-Type: application/json' \
--data-binary '{"properties": {"container_sid": "a0323bcc-df67-4ad6-845f-9b11bdf4e778", "greeting": "https://storage.carrierx.com/f/f54182d5-83f2-4048-922a-4dddba034da8", "callback_method": "POST", "callback_url": "http://your-website.com/your-app"}}' \
-H 'Authorization: Bearer 5ebc03d6-8b2b-44ad-bf65-72d4f1491dda'
A successful request will return a 200 status code and the altered endpoint body data with the properties set in the JSON format:
{
    "addresses": [],
    "attributes": {},
    "capacity": 0,
    "endpoint_sid": "7bbb5255-234f-4288-a80d-c8b99eecad0d",
    "name": "voicemail",
    "out_sip_password": null,
    "out_sip_username": null,
    "partner_sid": "ed437757-002d-4ecc-aa5a-efdf5e50dba0",
    "properties": {
        "callback_method": "POST",
        "callback_url": "http://your-website.com/your-app",
        "container_sid": "a0323bcc-df67-4ad6-845f-9b11bdf4e778",
        "greeting": "https://storage.carrierx.com/f/f54182d5-83f2-4048-922a-4dddba034da8",
    },
    "transformations": [],
    "type": "voicemail",
    "voip_token": null
}
V. Use Transcriptions
- Create a web application hosted in the web that will have the
/transcriptionsendpoint at the same domain (if you have your application running athttp://your-website.com/your-app, thehttp://your-website.com/transcriptionsmust also be accessible there), will listen for the incoming requests, and can accept and process the sent data in the JSON format at that address. - Add the
callback_urlattribute to the Voicemail endpointpropertiesthat has the web application domain as a part of its value (see Step IV).
When the messages are recorded, the Voicemail endpoint will create transcriptions for the recorded messages.
Please note that the transcription process is not immediate. It might take some time (from several seconds to several minutes) especially with longer voicemail messages.
When the transcription is ready, the Voicemail endpoint will submit it to the http://your-website.com/transcriptions address with a POST request. This request will contain the transcription text together with the following data in the request body:
{
    "AccountSid": "",
    "ApiVersion": "2.0",
    "CallSid": "4bc41f6e-f46d-4ce9-9ee1-70ff34d44922",
    "CallStatus": "",
    "Direction": "inbound",
    "From": "17605692222",
    "OriginalFrom": "+17605692222",
    "OriginalTo": "23372337",
    "RecordingFileSid": "ea662226-9f71-44fe-858f-f8b624034974",
    "RecordingUrl": "https://storage.carrierx.com/f/ea662226-9f71-44fe-858f-f8b624034974",
    "timestamp": 1595329919,
    "To": "23372337",
    "TranscriptionSid": "cac8582f-db8a-4c4d-82e5-3e8026435a54",
    "TranscriptionStatus": "completed",
    "TranscriptionText": "This is a transcribed voicemail message",
    "TranscriptionUrl": ""
}
The following attributes are included:
| Attribute | Data Type | Description |
|---|---|---|
| AccountSid | string | The identifier of the account used to accept the call. |
| ApiVersion | string | The API version used to accept the call and create the transcription. |
| CallSid | string | The identifier of the call that was recorded. |
| CallStatus | string | The status of the call. |
| Direction | string | The direction of the call related to the Voicemail endpoint. |
| From | string | The incoming call number. |
| OriginalFrom | string | The incoming call number before any transformations were applied. |
| OriginalTo | string | The outgoing call number before any transformations were applied. |
| RecordingFileSid | string | The identifier of the message recording that was used to create the transcription. |
| RecordingUrl | string | The publicly accessible URL of the message recording. |
| timestamp | integer | The UNIX timestamp of the moment when the transcription was completed. |
| To | string | The destination call number. |
| TranscriptionSid | string | The identifier of the transcription file. |
| TranscriptionStatus | string | The status of the transcription. |
| TranscriptionText | string | The complete text of the message transcription. |
| TranscriptionUrl | string | The publicly accessible URL of the transcription. |
If you choose to skip the implementation of the application or the http://your-website.com/transcriptions returns an error status code, the Voicemail endpoint will simply ignore it and continue without any problems.
VI. Set Custom Greetings
- Create a web application hosted in the web that will listen for the incoming requests, and can return the necessary custom greeting URL address in the encoded format.
- Add the
callback_urlattribute to the Voicemail endpointpropertiesthat has the web application domain as a part of its value (see Step IV).
By default, the Voicemail endpoint will use the greeting specified in the properties.greeting attribute for all the incoming calls. Based on the incoming call data, dedicated greetings can be specified for calls with certain data (e.g., a specific phone number).
At the beginning of each call the Voicemail endpoint can pass the control over the call flow to your application using a method similar to the FlexML Redirect verb.
Below is the example of what the data sent to your application might look like (refer to the description of the parameters at Step V):
{
    "AccountSid":"",
    "ApiVersion":"2.0",
    "CallerName":"",
    "CallSid": "4bc41f6e-f46d-4ce9-9ee1-70ff34d44922",
    "CallStatus":"",
    "Direction":"inbound",
    "From": "17605692222",
    "OriginalFrom": "+17605692222",
    "OriginalTo": "23372337",
    "timestamp": 1595329919,
    "To": "23372337"
}
You are free to develop the application using any software means, but we strongly recommend that you use FlexML API for more compatibility and easier integration of your application with the Voicemail endpoint.
At the very basic scenario your application should simply search for a greeting file using the data received (e.g., select a custom greeting file for the "From" phone number received in the JSON). Then the call flow control must be returned back to the Voicemail endpoint together with the greeting URL passed as the gr parameter in its query string. The value of this parameter is set to the URL of the custom greeting file, e.g.: ?gr=http%3A%2F%2Fyour-storage.com%2Fyour-greeting.mp3
The response from your application must include all the data in the JSON format that the Voicemail endpoint initially sent to your application.
For example, if you use FlexML for your application, the following code will turn over the call flow control back to the Voicemail endpoint together with the URL of the custom greeting file, which will be used for the current call:
<Response>
    <Redirect>https://voicemail.carrierx.com/?gr=http%3A%2F%2Fyour-storage.com%2Fyour-greeting.mp3</Redirect>
</Response>
You need to replace the https://voicemail.carrierx.com/ URL with the one from which your application received the initial request from the Voicemail endpoint, and http://your-storage.com/your-greeting.mp3 is the URL of your greeting file. FlexML will automatically include the initial data received from the Voicemail endpoint into the response when you use the Redirect verb.
Please note that the media file URL must be reachable by Voicemail endpoint.
If the gr parameter is missing, or no media file can be found at the received URL, Voicemail endpoint will fall back to the default greeting specified in the properties.greeting attribute.
VII. Next Steps
You have created a Voicemail endpoint! The next steps before you can start using the created endpoint, might be the following:
- Create a trunk group and assign it to your endpoint.
- Assign a phone number to the new trunk group created alongside the Voicemail endpoint.
- Create a FlexML application that will help you manage your voicemail messages.