Storage and Recording
Introduction
In this guide, you will learn how to set up storage and recording through the FlexML endpoint. The FlexML endpoint can be configured to save recordings. Recordings are integrated with the Storage API system. A container holds files, which are created automatically by the system when a recording is completed.
I. Configure Container
In this section, we will configure a container. This container will store files for recordings made through our FlexML instructions.
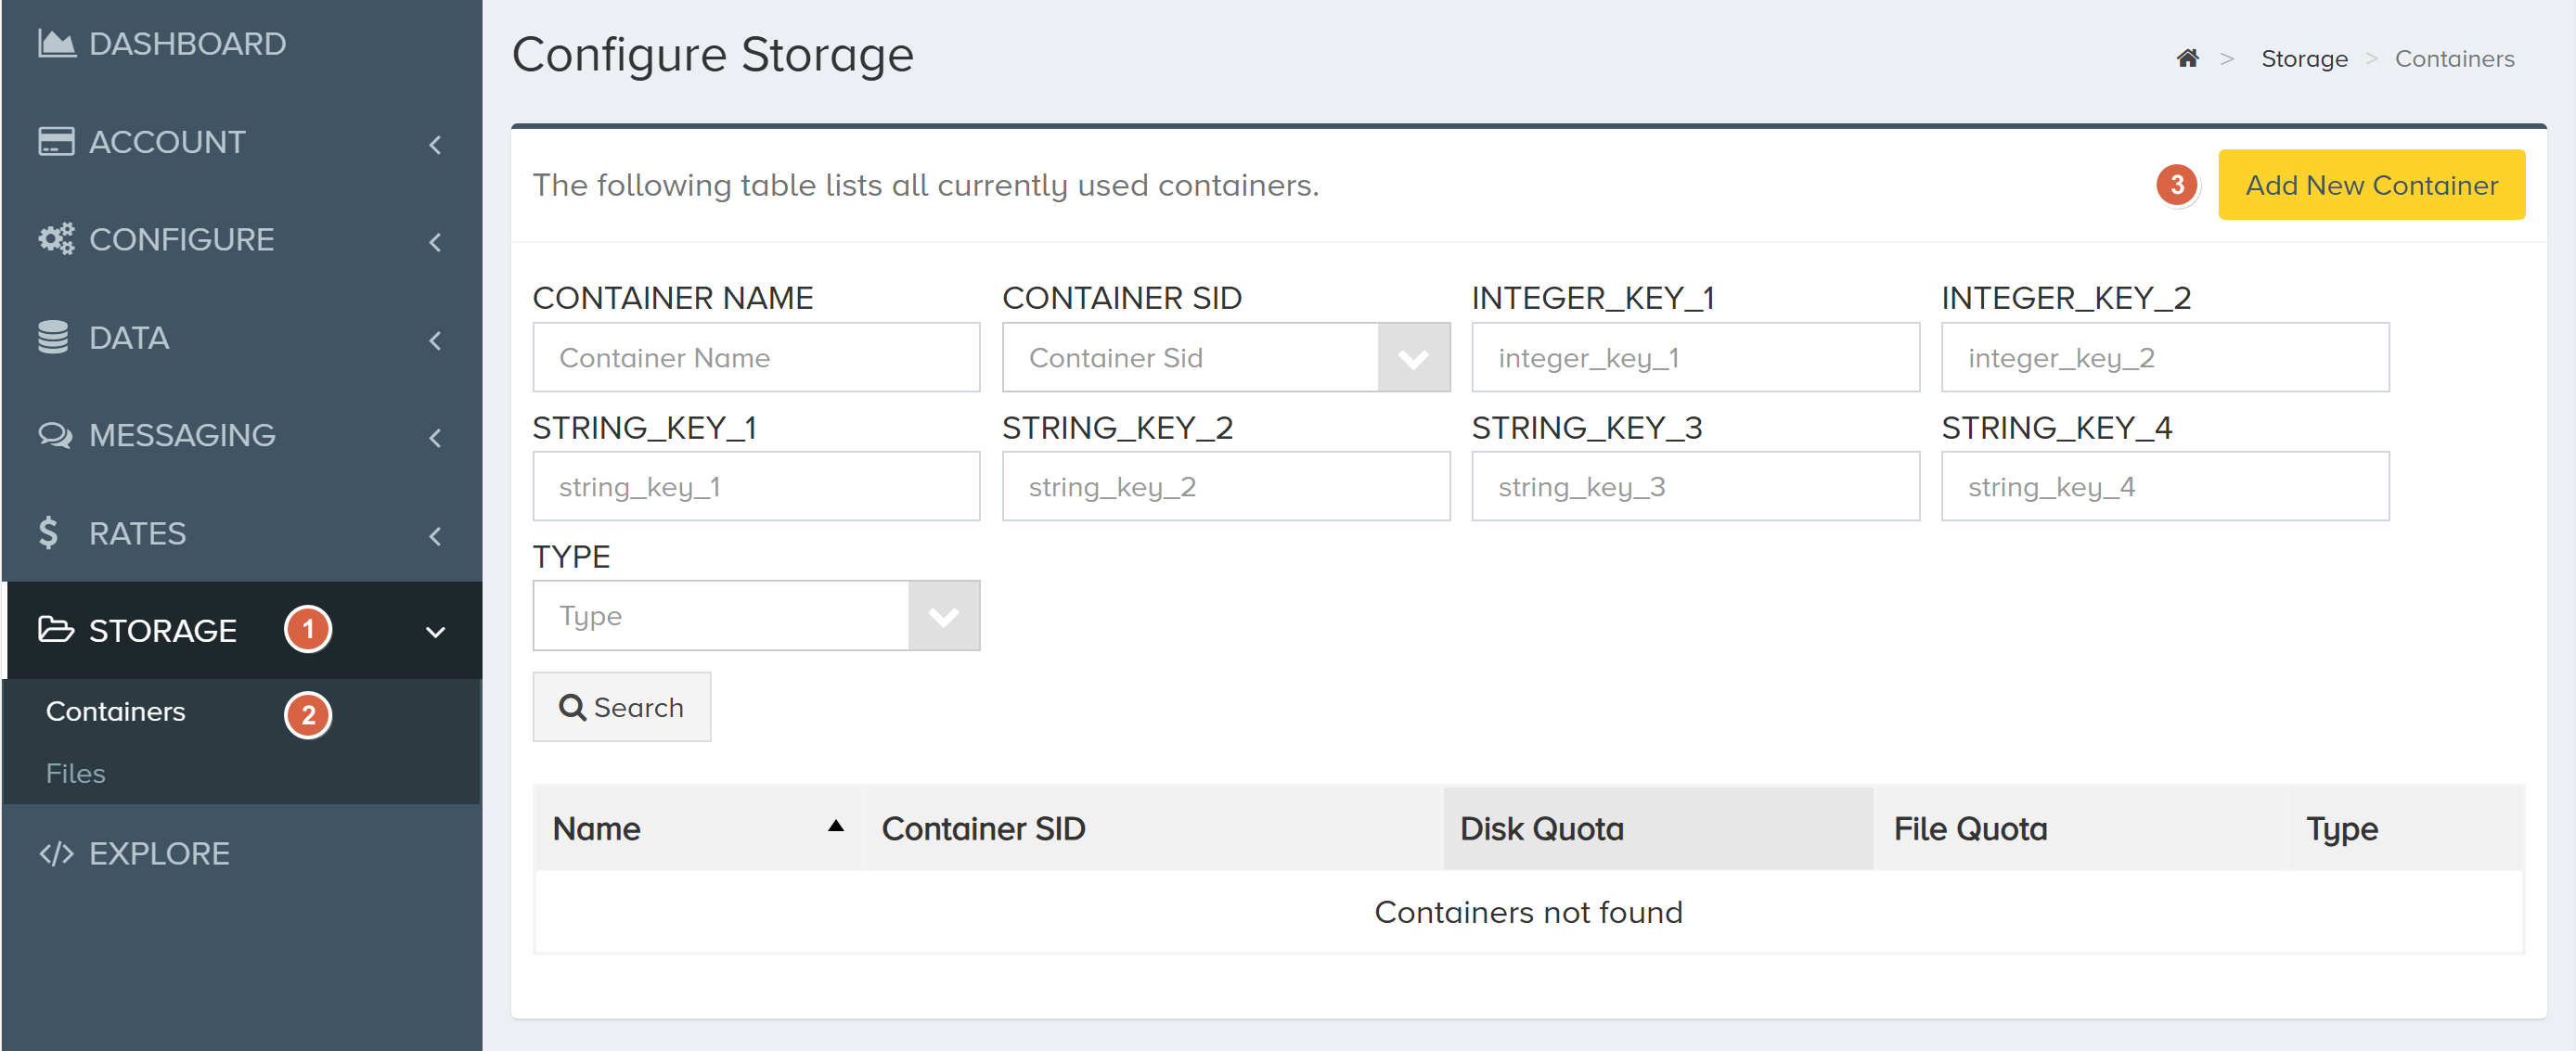
In the left-hand navigation menu, select Storage > Containers. Then, in the top-righ corner, click the Add New Container button.

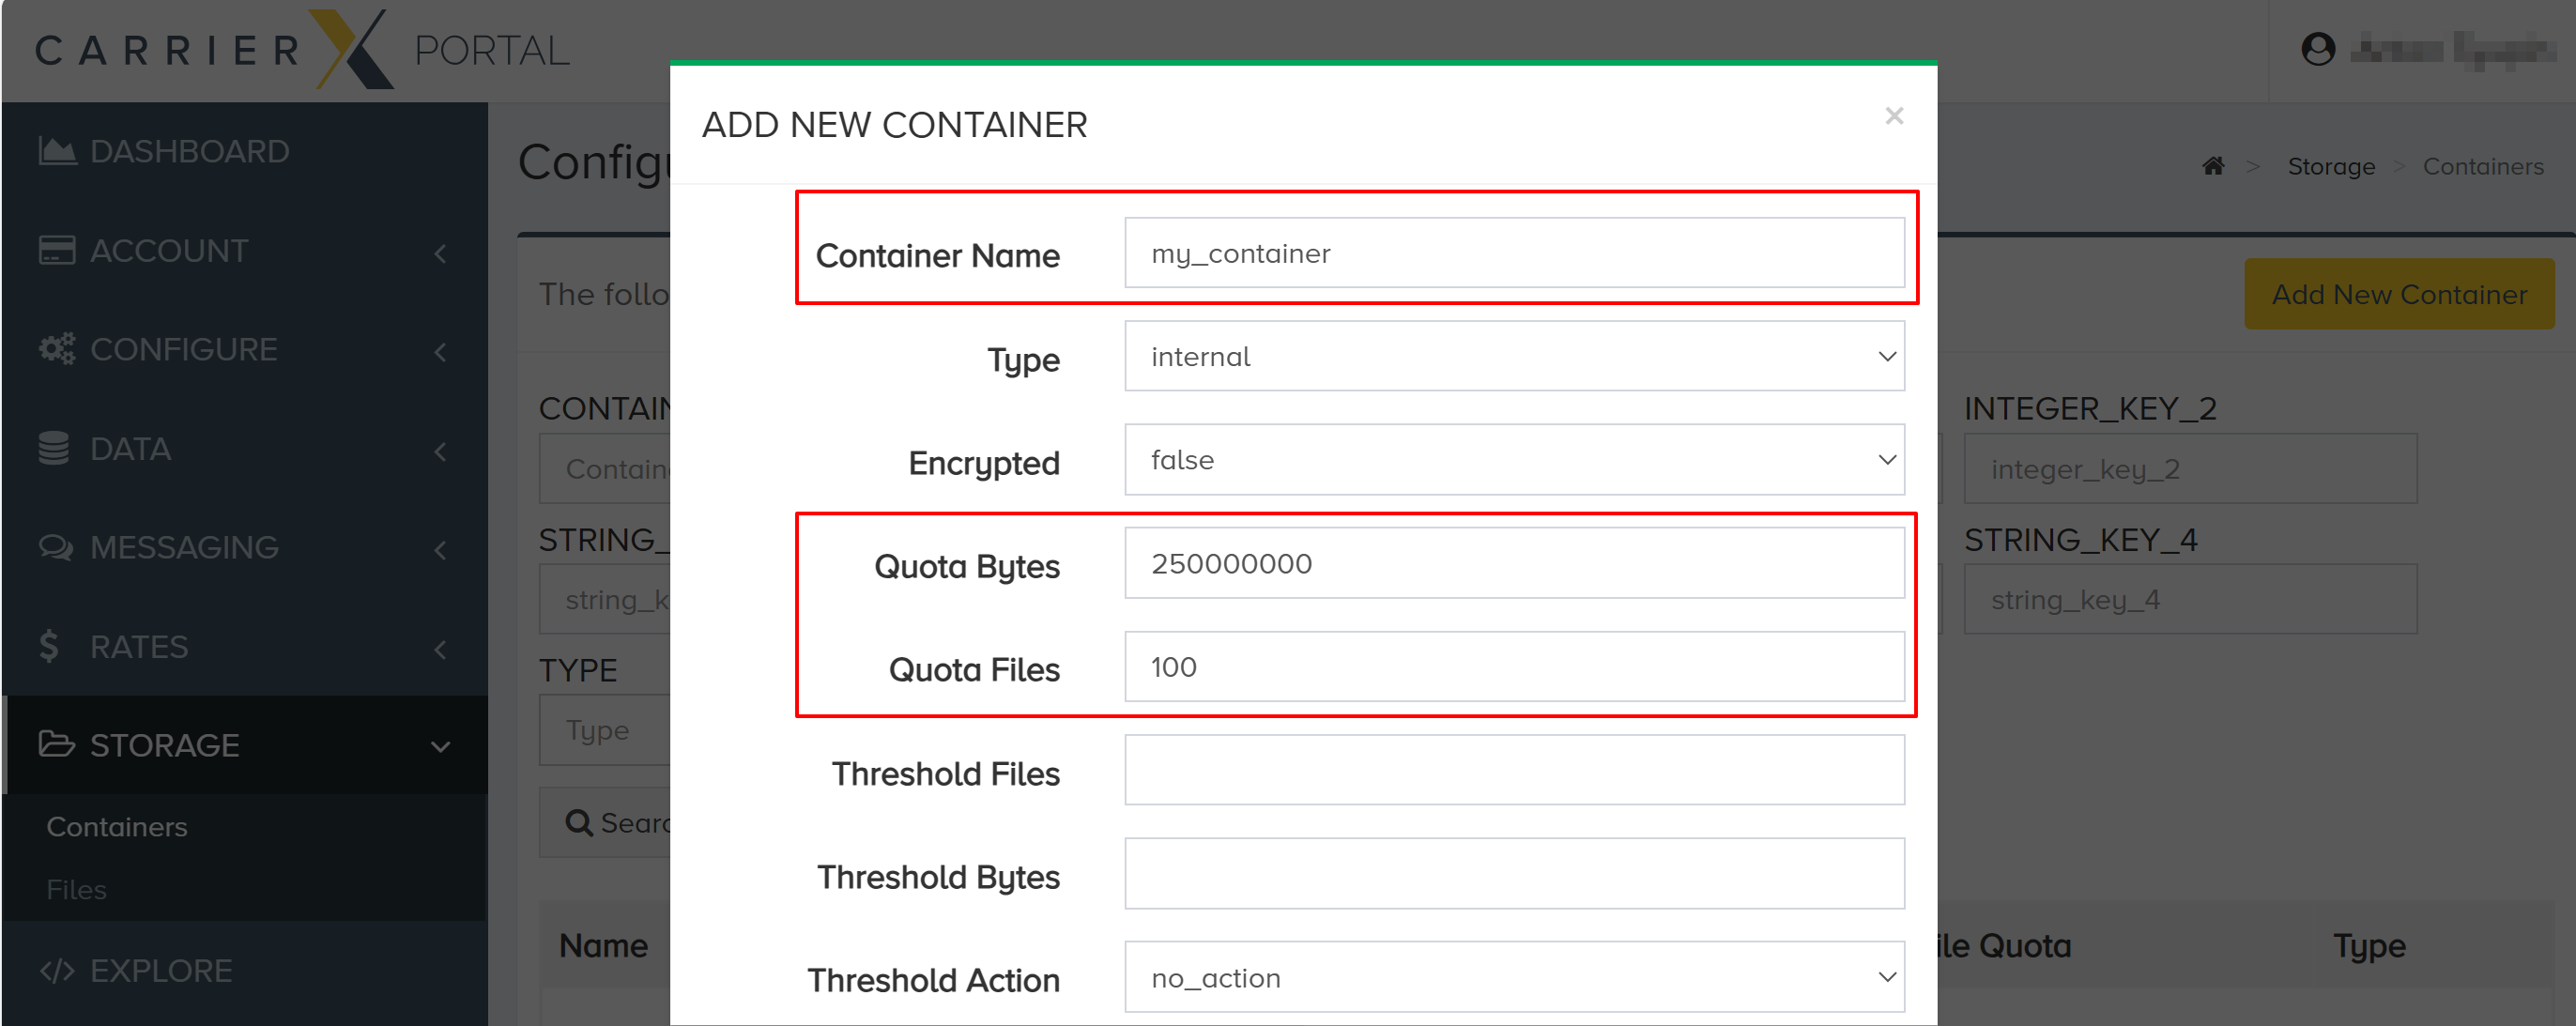
In the ADD NEW CONTAINER popup, enter a name for the new container. This is a friendly name that is used for internal reference, e.g. my_container.
Enter integer values for Quota Bytes and Quota Files. The Quota Bytes is the maximum size of the container in bytes, and the Quota Files is the maximum number of files that can be stored in the container. Note that the quota sizes should be large enough to accomodate the size and amount of files that you require. Leave the remaining fields blank for now.

Scroll all the way down and click Add Container when finished.
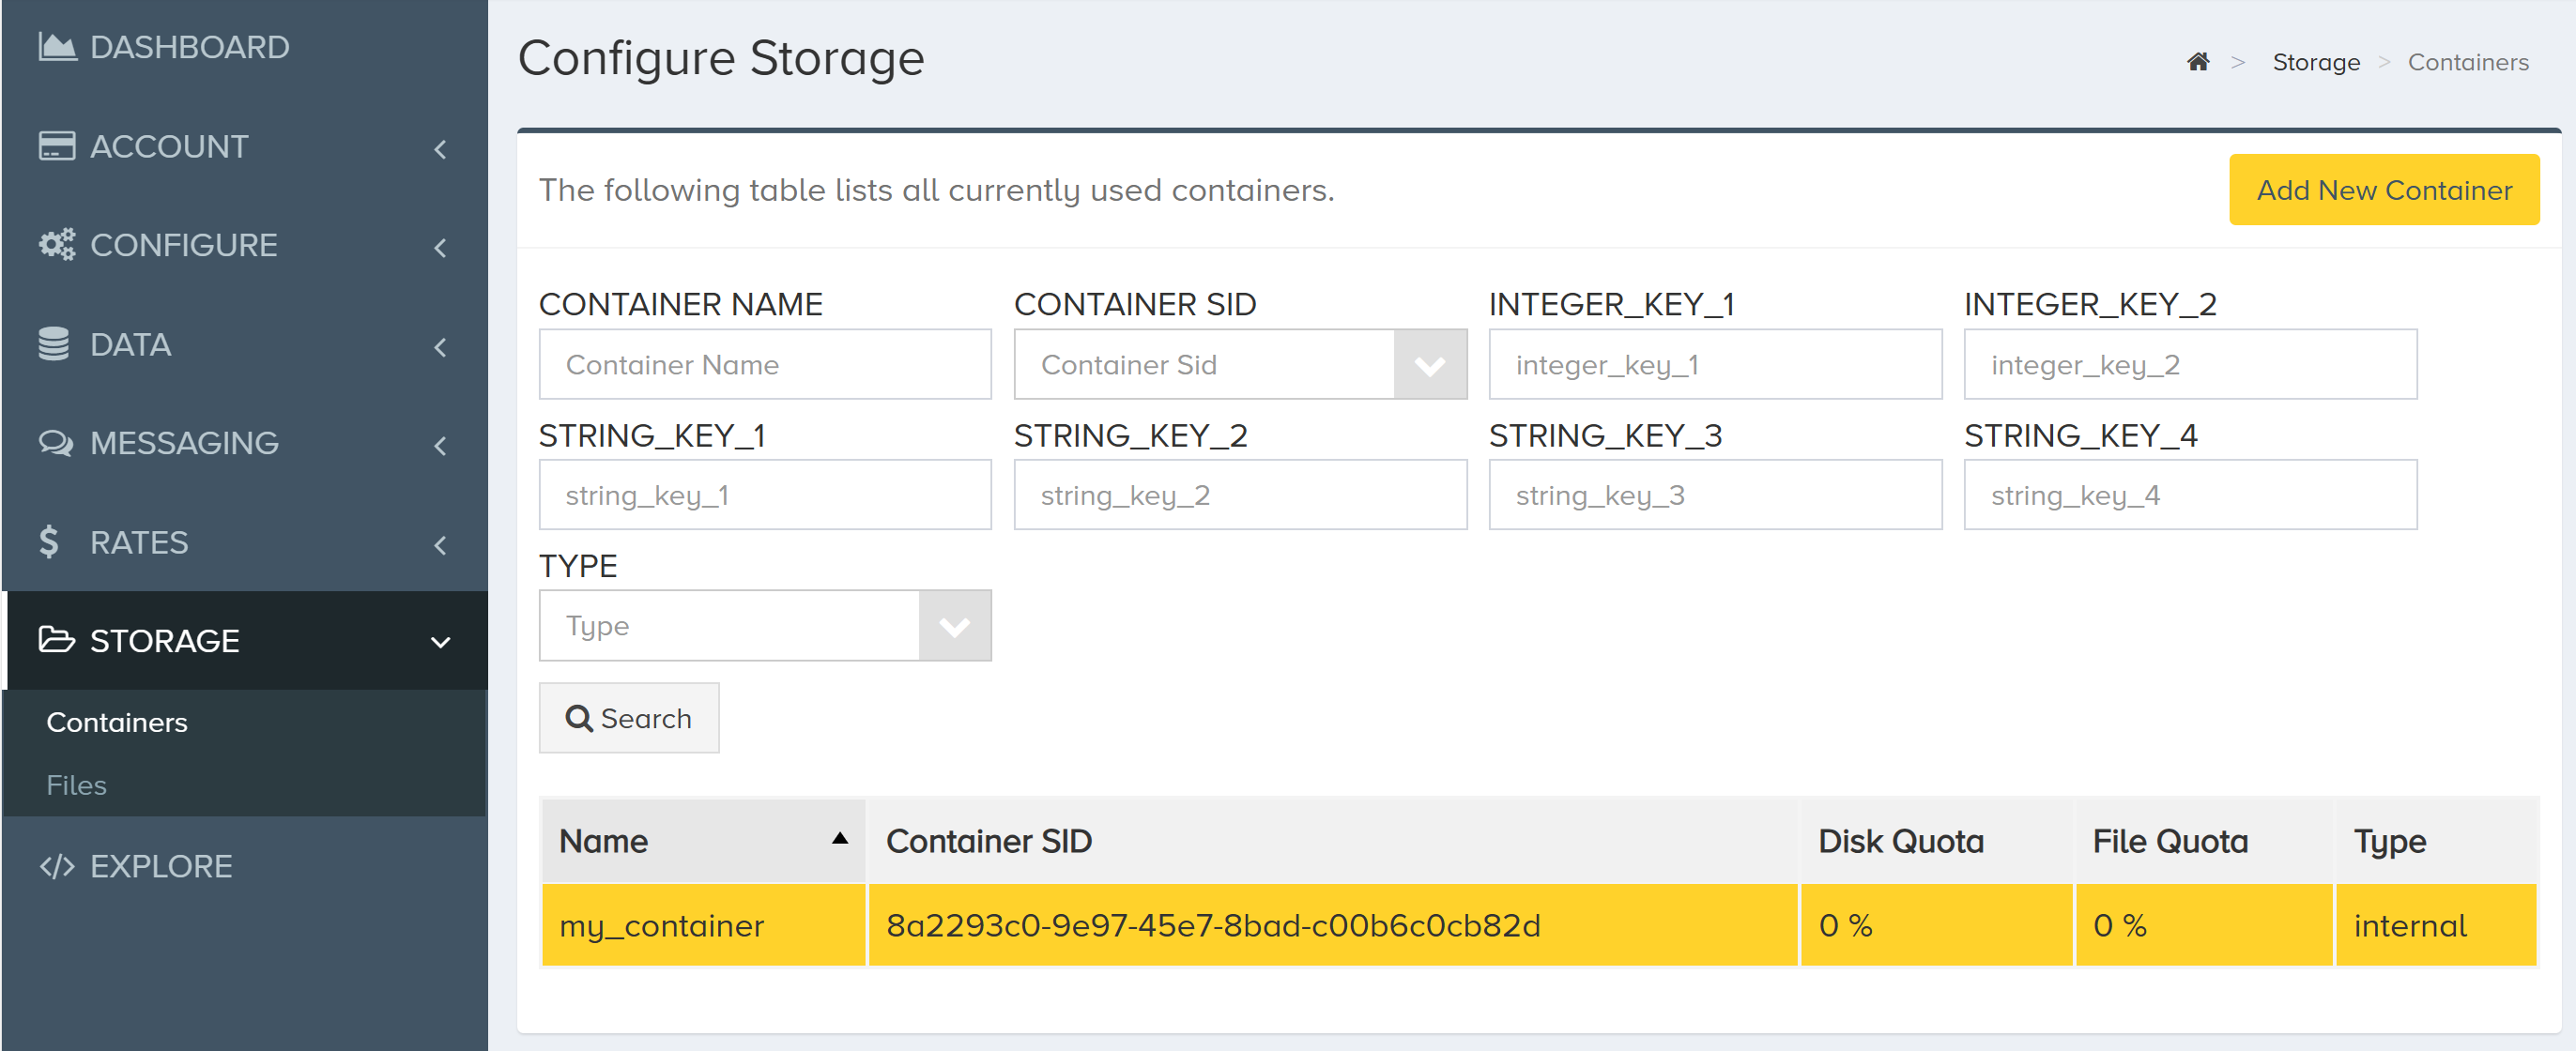
Your container is created! Click on it to see it details. We will use the Container SID in the next step.

The Container SID is a secure ID that is used to identify the container. It is a UUID (Universally Unique Identifier) that is generated when the container is created. The Container SID is used in the FlexML instructions to specify which container to use to store recordings. The Container SID is also used in the Storage API to access the files stored in the container.
Now that we have created a container, we can store recordings. We can assign a container two ways – in our FlexML instructions as a supported attribute and to the FlexML endpoint. First, we will look at assigning the container to the Record verb in our FlexML instructions.
II. FlexML for Recordings
In this section, we will set up recording for calls using FlexML. Refer to the FlexML Endpoint Quick Start Guide for instructions to create a simple FlexML application. This application has three components – Python server and routing, ngrok tunnel to expose our localhost to the public Internet, and FlexML instructions.
The way that our sample application is built is just an example. It is not necessary to build your application with Python or to use ngrok.
After setting up a basic application, we will serve the following FlexML from one of the routes. All of our code is nested within code tags. The Record verb is where we assign settings to the recording method. The containerSid is the secure ID for the container that we created in the previous section, Configure Container. Refer to the FlexML API documentation on the Record verb for a comprehensive list of supported attributes.
<Response>
    <Say>Thank you for calling. Please leave a message. </Say>
    <Record containerSid="8d53344a-f312-40f8-93f5-bfba3f790b63" callbackUrl="/path/to/handler"></Record>
</Response>
In this example, the caller will hear the message between the Say tags, and then the recording will start. The Record verb can be customized with supported attributes, like the following:
actionis another set of FlexML instructions that will be requested after the recording has finished. Adding an action supporting attribute means that any verbs after the current verb will not run.callbackUrlwill provide data about a recording after it has ended.integerKey1,integerKey2,stringKey1,stringKey2can be used to set any meaningful data that you would like. This data can be used later for reference or filtering.playBeepwill play a beep noise before a recording begins.recordSessioncan be used to record an entire session in the background.
For a full list of supported attributes for the Record verb, refer to the FlexML API Reference.
Once the call is complete, the system will make a request to the callbackUrl and send back the following object.
{
    "AccountSid": "",
    "ApiVersion": "2.0",
    "CallerName": "",
    "CallSid": "c996365e4043dc1d7c33a6f2829f9983",
    "CallStatus": "",
    "OriginalFrom": "19093189029",
    "OriginalTo": "19093189029",
    "Direction": "outbound-api",
    "From": "19093189029",
    "RecordingDuration": 10,
    "RecordingFileSid": "7140cb0a-76a4-49fa-99a8-31ab00b71bd3",
    "RecordingStatus": "completed",
    "RecordingUrl": "https://storage.carrierx.com/f/7140cb0a-76a4-49fa-99a8-31ab00b71bd3",
    "To": "19093189029"
}
The RecordingUrl value has a link to the recording. You can also use the RecordingFileSid to access the recording using the Storage API.
III. Assign Container
Rather than assign the containerSid as a supported attribute in the FlexML itself, you can also assign a container to an endpoint. This way, all recordings will be saved to that container unless the container secure ID is overridden within the FlexML.
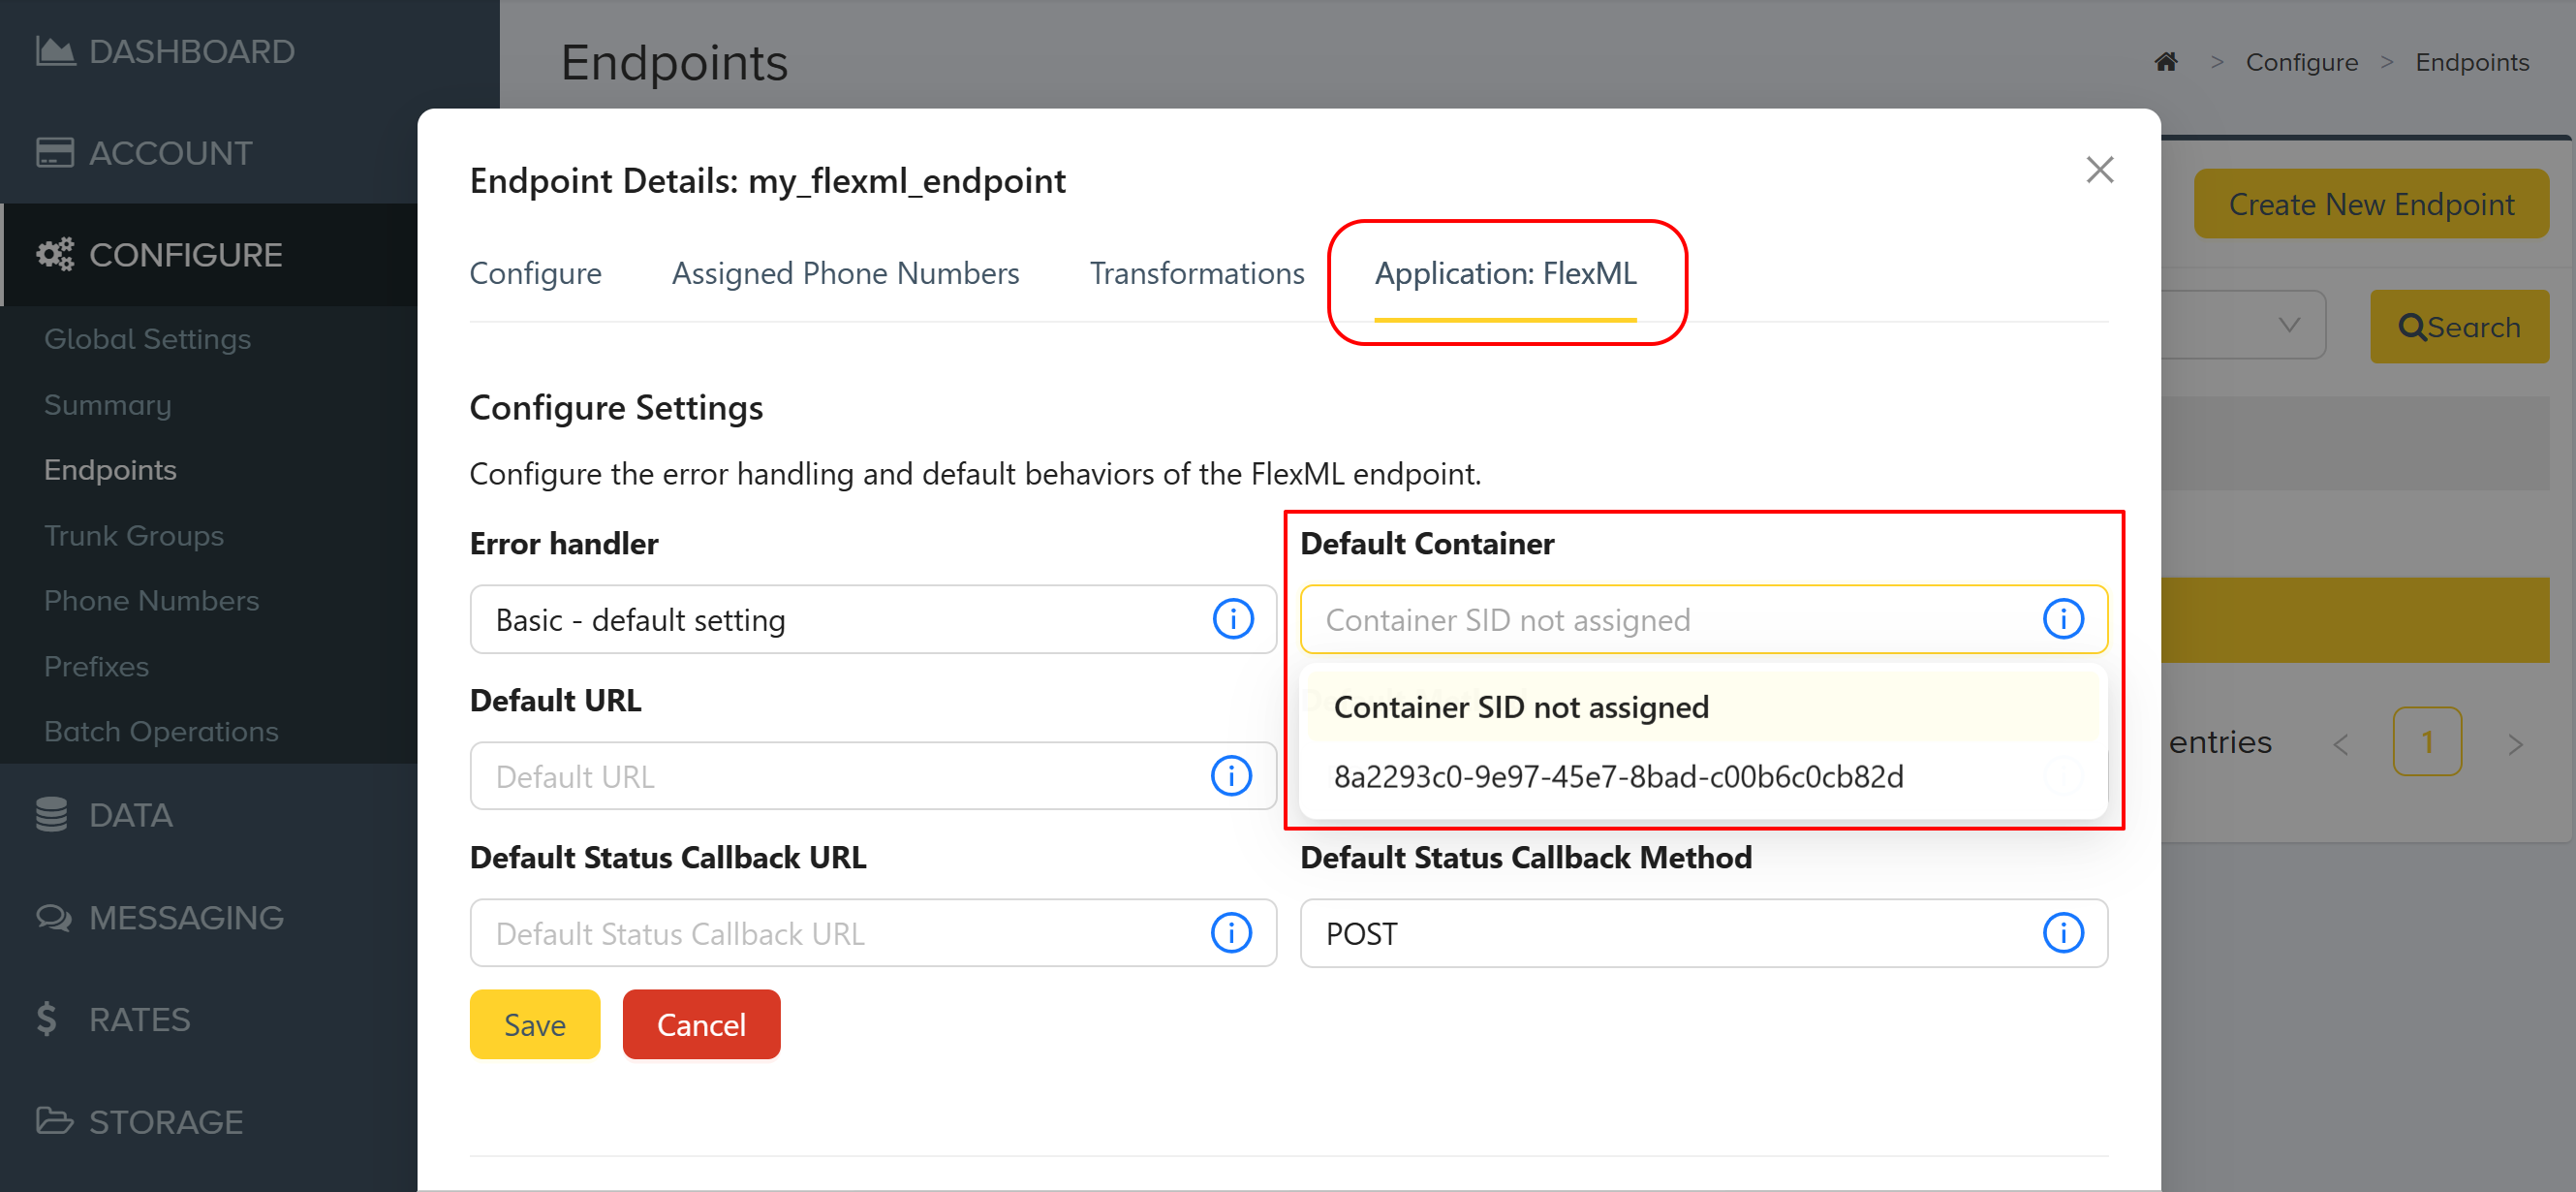
Navigate to the Configure menu, click Endpoints and select the endpoint you want to associate a container with.

Select the Application: FlexML tab and click Edit.
Select the container you want to associate with the endpoint from the Default Container dropdown menu.

Click Save.
This container will store all of the files for this FlexML endpoint. A container can also be assigned to a FlexML endpoint programmatically. The container_sid is passed in the properties object. Refer to the Endpoints section of the Core API Reference for more information. The container_sid can be assigned when the endpoint is first created, or later through a PATCH or PUT request.
IV. Next Steps
You have configured storage and recording with FlexML! For more information, refer to the FlexML API Reference.