Send Push Notifications to Devices
When you develop a mobile or a browser application, you will often want to add the ability to send push notifications to it. CarrierX API allows you to associate the application with the device where it is installed and send push notifications to that device.
Push Concepts
The concepts in CarrierX API behind sending push notifications to mobile or browser applications are the following:
-
Application is either a mobile application written for iOS or Android users and published in the mobile store (Google Play Store or Apple App Store), or an application running in a browser. The application is the same for all the users who install it. In CarrierX API, the application properties are described by the Application object.
-
Device is the instance of the application installed on a specific user mobile device or a web version running in a browser on any OS. The device is identified by a unique device ID and is associated with the Application object. Multiple devices can be associated with one and the same Application object when the users install these applications from a mobile store or from a website hosting your app. In CarrierX API, the device properties are described by the Device object.
-
Notification is the text message sent through CarrierX API to the application instance installed on a mobile device or running in a browser. In CarrierX API, the notification properties are described by the Notification object.
Getting Started with Notifications
To send push notifications with CarrierX API, first you need to create an application, which will receive such notifications. Such application can be either of the following:
- A mobile application, which you need to publish in a mobile store. CarrierX currently supports applications for two mobile stores:: Apple App Store and Google Play Store. You need to register your application with one or both of these stores, and get the data that the developer platforms for these stores provide.
- A browser application, which you can host on your own resource or on a 3rd party server.
In this tutorial, you will learn how to send push notifications to Android devices through CarrierX API.
To create an iOS or a browser application, the steps will be similar.
1. Create Application Object
First, you need to get authentication credentials. Depending on the platform, you will need:
apns_id,apns_p12, andapns_p12_passwordfor Apple applications;google_credentialsfor Android and browser applications. This is a Google Auth Credentials JSON file, encoded to Base64 format. Refer to Google Firebase Cloud Messaging documentation for information on how to generate such JSON credentials file.
You must then create an Application object within CarrierX API that corresponds to your mobile application. You can do this using the following request:
curl -X POST \
'https://api.carrierx.com/core/v2/push/applications' \
-H 'Content-Type: application/json' \
--data-binary '{"google_credentials": "GOOGLE_AUTH_CREDENTIALS_JSON_FILE","name": "My First Application"}' \
-H 'Authorization: Bearer 5ebc03d6-8b2b-44ad-bf65-72d4f1491dda'
We have not added the apns_id, apns_p12, and apns_p12_password fields because in this tutorial we are creating an Android application only.
A successful request will return a serialized copy of the created Application object which looks like this:
{
    "apns_id": null,
    "apns_p12": null,
    "apns_p12_expiration": null,
    "apns_p12_password": null,
    "apns_topic": null,
    "application_sid": "8b03edc1-5378-4c4e-a480-9015206089dc",
    "google_credentials": "GOOGLE_AUTH_CREDENTIALS_JSON_FILE",
    "name": "My First Application",
    "partner_sid": "e00430c3-a7d0-4666-ab5c-f7202448382f"
}
Refer to the Application object to view all the object attributes and their descriptions.
The typical flow for the applications looks like the following:

You can have a single Application object for both, the mobile applications in Apple App Store and Google Play Store, and for the browser application. In this case, you need to add the data for all the platforms as values to the Application object fields.
The system creates the application_sid attribute automatically for each Application object. You need this field value for the second step.
2. Create Device Objects
Once the store publishes the application, the end-users download and install it.
Now, you must create a Device object for each user device. It will represent the instance of your application installed on a mobile device and associated with this specific user device.
Do this with the following request:
curl -X POST \
'https://api.carrierx.com/core/v2/push/devices' \
-H 'Content-Type: application/json' \
--data-binary '{"application_sid":"8b03edc1-5378-4c4e-a480-9015206089dc", "type":"android", "token":"1234567890"}' \
-H 'Authorization: Bearer 5ebc03d6-8b2b-44ad-bf65-72d4f1491dda'
Here the token attribute is a unique alphanumeric string obtained from Apple Push Notification Service (APNs) or Google Firebase Cloud Messaging (FCM) depending on the device type. The token allows the system to unambiguously identify the mobile device. Each Device object created by CarrierX API will have a unique secure ID (device_sid) that will be associated with the token on the device. This will allow sending notifications to this specific device.
A successful request will return a serialized copy of the created Device object which looks like this:
{
    "application_sid": "8b03edc1-5378-4c4e-a480-9015206089dc",
    "application_version": "",
    "device_sid": "56d485ae-0693-421a-91eb-6b02b152573a",
    "environment": "production",
    "os_version": "",
    "partner_sid": "e00430c3-a7d0-4666-ab5c-f7202448382f",
    "token": "1234567890",
    "type": "android"
}
Refer to the Device object to view all the object attributes and their descriptions.
The typical flow for the devices looks like the following:

As a good practice, your application can create Device objects in CarrierX API when the users launch the application for the first time or when they register within the application (if registration is required).
Now that you have the Android application in the mobile store together with the corresponding Application object in CarrierX API and the end-user Android devices with this application installed together with the corresponding Device objects in CarrierX API, you can send push notifications to these end-user devices with the help of CarrierX API requests.
3. Send Push Notifications
To send push notifications from CarrierX API to mobile devices, you need the list of all the secure IDs of the devices which will receive these notifications. These secure IDs can be from the devices that you saved into a database depending on their subscriptions, or it can be a complete list of all devices associated with the specific application_sid (i.e., the devices with your mobile application installed).
In any case, the list of the device secure IDs (the Notification object recipients attribute) is the only parameter you need to send notifications. But in this case, the device will receive an empty message which some mobile devices will not even display (though the notification will be marked as successfully sent by CarrierX API).
To send real-life meaningful notifications, you will need to set additional attributes to them. The minimum list of these attributes is: recipients, title and body.
Do this with the following request:
curl -X POST \
'https://api.carrierx.com/core/v2/push/notifications' \
-H 'Content-Type: application/json' \
--data-binary '{"title": "Test Notification", "body": "This is a test push notification for the registered device.", "recipients": ["8b03edc1-5378-4c4e-a480-9015206089dc", "16e64699-3064-463b-8dc7-96783c08a3d9"]}' \
-H 'Authorization: Bearer 5ebc03d6-8b2b-44ad-bf65-72d4f1491dda'
Refer to the Notification object to view all the object attributes and their descriptions.
A successful request will return a serialized copy of the notification delivery status which looks like this:
{
    "failure": 0,
    "results": {
        "16e64699-3064-463b-8dc7-96783c08a3d9": "success",
        "8b03edc1-5378-4c4e-a480-9015206089dc": "success"
    },
    "success": 2
}
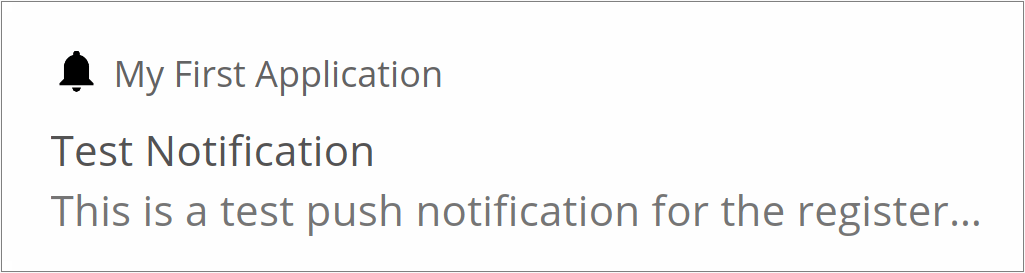
The affected devices will display push notifications. The notification appearance will depend on the device type and might look like this for an Android device:
The typical flow for the notifications looks like the following:

Further Reading
Application, Device, and Notification Objects API Reference
Refer to the Application, Device, and Notification objects API reference to get the complete list of their attributes and methods used with them:
Application Object
- Application Object
- Create Application to Send Push Notifications
- Get Applications
- Get Application by SID
- Update Application
- Delete Application
Device Object
- Device Object
- Create Device to Send Push Notifications
- Get Devices
- Get Device by SID
- Update Device
- Delete Device